Apartment Composting Without Worms: 5 Best Tips
Composting food scraps can be done even without a large backyard. You can even make apartment compost without worms. Instead, you can go for organic materials such as tea bags or kitchen waste. Then, take advantage of your balcony to compost. This article will guide you through making compost in your apartment. Let’s read on to discover!
How To Make Apartment Composting Without Worms?
You can compost in an apartment without worms by using Bokashi or electronic devices. Bokashi composting is a traditional form of composting and is one of the most common solutions for many people. Without worm compost, you can go for other options for apartment composting. Here are some ideas you may want to try:
Bokashi composter
Bokashi composting, which literally means “fermented organic matter,” is a new, odorless form of composting. Bokashi composting requires a smaller composting container than other methods. In place of worm compost, Bokashi composting produces nutrient-rich compost through fermentation.
To make Bokashi, please follow these steps:
- Use the Bokashi bran to cover kitchen scraps or other waste.
- Top the covered waste with additional bran and put it in your container.
- Remove any air bubbles by pressing down on the combination.
- Repeat until the container is completely full.
- Cover the container after it’s full. Make sure the container has as little air inside as possible.
- Allow for a two-week soaking time. Remember to empty the liquid that has accumulated at the bottom every few days.
- You may use this combination the same way you would any other worm tea or compost. But the liquid produced through Bokashi composting is acidic.
Due to their acidity, the composts will not be suitable for community gardens immediately. Hence, Bokashi compost should be buried in the soil for about four weeks to finish the fermentation process. You’ll need a bigger composting container than the one for Bokashi to accomplish this task in your apartment. You should cover the base of the container with soil and top it with the Bokashi scraps and some more soil.
The Bokashi Composting Kit is a tool suitable for beginners. This kit includes everything you’ll need to get a Bokashi compost container for your apartment.
Pros:
- Odorless composting
- Fast turnaround period
- Easy-to-access fertilizer
- Small and convenient
Cons:
- You may need to buy more kits because they will fill up fast.
Electronic bins
Electronic bins are often called food digesters. Electronic bins dehydrate food scraps, reducing their volume by more than 90% within four to eight hours. To use them, just fill the bin with your food waste and set it aside to complete its cycle. Once the process is complete, you may utilize the composted material as fertilizer and mulch right away.
Pros:
- Odorless and compact
- Quick to prepare
- Excellent for those who live in a tight place
Cons:
- Quite expensive
Compost tumblers
You can combine traditional composting processes with an apartment-friendly design using this method.
Compost tumblers have a capacity of more than 50 gallons, making them more suitable for those who have an outdoor space or a balcony. Tumblers for composting are simple to use. Simply fill the containers with your composting material and flip the bin several times to mix the combination every three days or until you have done composting.
Pros:
- Best for beginners
- Large capacity
- Perfect for those who like traditional methods
Cons:
- It is quite large so it isn’t suitable for small spaces
DIY Plastic Container
DIY Plastic Container is a method for making a compost bin yourself out of a plastic container.
To make the bin, all you need is:
- A big plastic tote
- Wire mesh
- A drill
- Kitchen waste
Start by drilling holes one to two inches apart around your tote, including the bottom and the lid. The waste will aerate and grow into compost in this manner. If you’re afraid of leaks, you may buy an extra tote of the same size to put the bin in. After drilling your holes, line the bag with wire mesh to keep bugs out.
Put your homemade compost container in a convenient position for you, such as outside the window or on the balcony. Then fill and maintain the bin. Turning your container every few days can help it aerate. If you are working on a smaller scale, you can accomplish the same thing with 5-gallon buckets instead of plastic totes. You will have some more interesting ideas for making your composting container by checking out this video.
Pros:
- Cheap
- Easy-to-prepare tools
- Quick to set up
Cons:
- You have to check the aeration regularly.
What Foods Can and Can’t Be Composted Indoors?
You must be attentive to smells and insects while composting inside, especially if you have neighbors. Some biodegradable waste is more likely to cause trouble than others, so here are some guidelines for what you can and shouldn’t put in indoor bins.
Good for composting
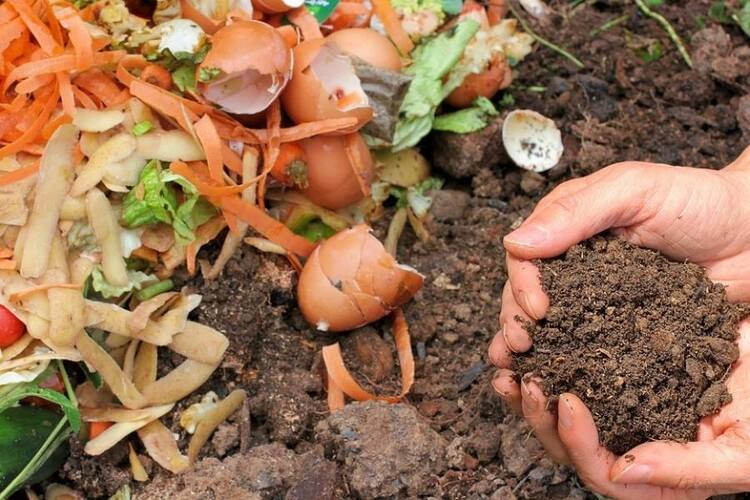
You can use these organic materials to compost:
- Coffee grounds
- Teas or tea bags
- Green waste
- Crushed eggshells
- Nutshells
- Seaweed
- Hair and fur
- Most vegetable and fruit remnants
- Ashes from burned and untreated wood
- Sawdust
- Shredded newspaper and cardboard
The optimum result comes from balancing green waste (plant matter, vegetables, fruits, or grass) with brown waste (dry leaves, ashes, sawdust, or hair).
Not good for composting
When composting, avoid these materials:
- Meats
- Eggs
- Bread
- Grains
- Grease and fats
- Excessive amounts of onion and citrus peel
- Pet waste (only fur accepted)
- Coal and charcoal ash
Fatty foods and meat are vulnerable to gathering bugs and creating odor problems. Citrus fruits and onion peels can make the compost far too acidic to be effective. Parasites in animal waste, such as excrement or litter, can thrive in your manure and transfer to your plants, your pets, and even yourself.
Steps To Compost In An Apartment Without Worms
Here is a step-by-step guide to composting in an apartment without worms. Let’s start by gathering the necessary tools and materials:
- Compost bin
- Greens
- Browns
- Water
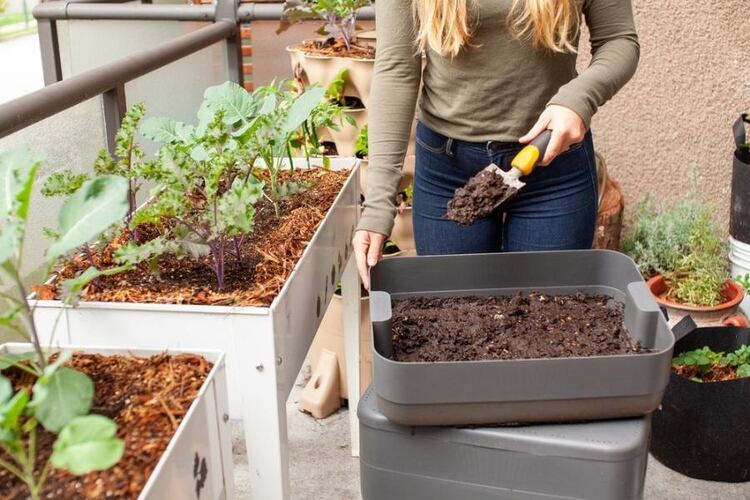
Step 1: Choose An Indoor Compost Bin
Compost bins built for small spaces are accessible. You can also choose a small tumbler kit for beginners. Otherwise, you may save money by making your own composter with buckets, wood, or storage bins for compost.
Step 2: Add scraps
You may now begin adding organic stuff to your bucket, such as food scraps. However, keep in mind that you’ll need a perfect balance of greens and browns.
You can use brown and green to examine the compost’s condition. Add more brown if the pile smells terrible. If the pile is too dry, add more greens. You may also buy 50/50 compost from the local hardware shop or farmers’ market if you don’t have any experience composting in the apartment.
Step 3: Add water
Moisture is essential for healthy compost piles, whether you’re vermicomposting or working with a ratio of 50-50 soil combination. You surely don’t want it to be wholly soaked but instead moist. The wetness should be equivalent to a wrung-out cloth.
Since you’re using the worm-free technique, make sure you stir properly after watering to avoid uneven moisture. Construct a rain barrel for a little space and a few solar lights to brighten up the area if you compost on the balcony. You can save water by using rainwater to irrigate your compost. If you’re going to drink the water, be sure to purify it first.
Step 4: Stir and collect
To aid the breakdown and avoid rotting, try to stir the worm-free treatment at least once a week. You can use a shovel, rake, mini shovel, or big wooden spoon for this task. Choose the tool based on the size of your compost.
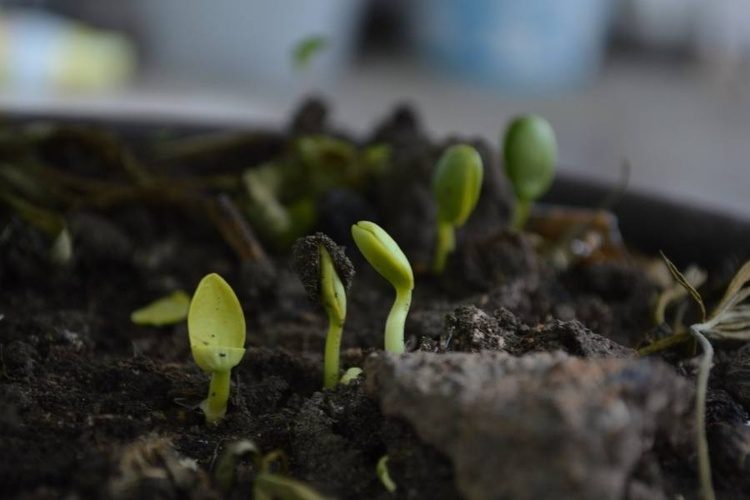
When you are stirring, make sure to toss and move all of the ingredients. It will assist in getting new materials toward the center of the pile so that the method works. After 3 to 12 months of consistent mixing, the fertilizer will form. You may now collect the fertilizer and put it to use.
Step 5: Repeat steps 3–5
Remove everything and lay down new bedding as instructed in step 2 after the old bedding is no longer there. Reintroduce some of your fertilizer. You may save the remaining fertilizer and use it on your indoor plants. Repeat the cycle by adding browns, and after everything goes back in place.
How Long Does Compost Take To Prepare?
The answer to this question totally depends on the composting method you choose.
It might take about four months for conventional vermicomposting to be ready to work. On the other hand, indoor composting is far more efficient.
Compost tea may be ready to use as quickly as a few days using Bokashi composting, but the final decomposition of the wastes may require up to four weeks. If you use indoor composters, such as food recyclers, they will give you a garden-ready product in just a few hours.
If you use a compost tumbler, your fertilizer can be complete in three weeks after you begin adding scraps. Using a plastic container more closely resembles traditional methods in terms of time. However, you can use the fertilizer after two months as long as you give it the right conditions.
Conclusion
Apartment composting without worms is an excellent method that is becoming incredibly common. There are various indoor composting options on the market. It’s up to you to decide which one is perfect for you. Hopefully, you will find this article helpful. Please share some tips to simplify the process with us if you have any. We’ll be so glad to hear from you.
Thank you for reading!