Does Potting Soil Go Bad? 3 Signs To Know

To develop and be healthy, your plants require the proper nutrients and atmosphere. Potting mix is crucial to their success or failure. For that reason, “Does potting soil go bad?” is a critical topic to consider.
Potting mix does not have an expiration date, but it can go bad over time. The presence of bacteria in potting soil can cause a bad smell, but it is not necessarily due to water. This post will cover all of the above issues in greater depth. Later, we will help you define how to make excellent-quality dirt.
Does Potting Soil Go Bad?
Not really. Potting soil can go bad, but it usually doesn’t if it’s been sitting around for a while and you’re ready to perform some potting mix rejuvenation. You may recover and utilize an old potting soil mix even if it has been sitting for several years.
The quality of your potting mix goes bad in several circumstances, including whether you opened the bag or unopened it or whether it is in a wet environment. Opened bags generally last at their best for 6 to 12 months. Things like air and excessive moisture may get inside the dirt, break down the nutrients, and compress the potting soil faster.
The following are some symptoms that your potting mix has gone bad:
Unpleasant Smell
The most straightforward approach to determining if your potting soil has gone bad is to smell it. It frequently smells like rotten eggs when the dirt has been waterlogged for an extended period.
By spreading the dirt in the sun and drying it, you can kill the bacteria causing the unpleasant odor. The sunlight will kill the germs, and it will be easy to use after it has dried.
Insects
Another clue that your seed-starting mix has gone bad is the presence of tiny insects crawling all over it. Fungus gnats can harm the roots of both older and smaller plants. These are generally safe for older plants, but they can hurt the roots of smaller plants. For that reason, it’s a pain to have them around your houseplants.
Fortunately, the larvae of fungus gnats may only live in the top 1-2 inches of damp dirt. Allowing the organic potting soil to dry completely and stay dry for several days should be enough to kill the gnats.
Other Diseases Or Mold
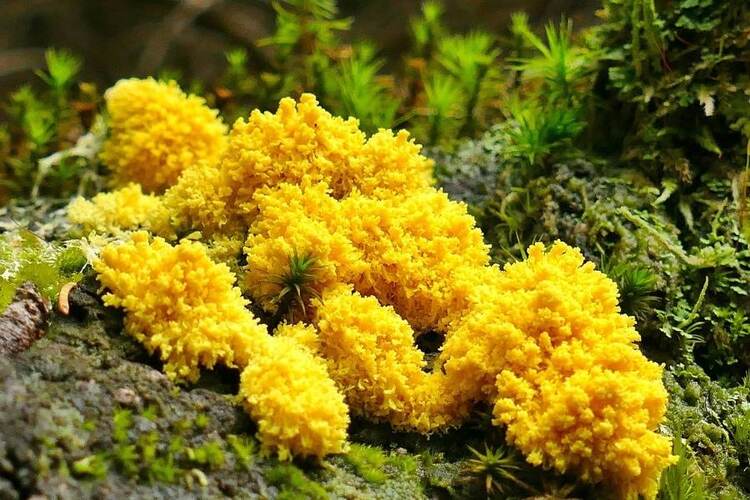
If you find dusty-looking green, white, or yellow mold on your potting mixes, it’s an indication that they’ve gone bad. Mold on potting soil can occur in various conditions, not just when it has been in a bag for a long time or in hot conditions.
Mold readily dies in fresh air and sunlight. So, the most straightforward approach to getting rid of it is to place it in a well-ventilated location or in the sun. On the other hand, antifungal therapy can help avoid root rot in plants if the mould infection isn’t too bad. If the seed-starting mix has become excessively moldy and useless, the best alternative is to discard it.
Dense Potting Soil
If your old seed-starting mix is thick and compacted, it might include decomposed peat moss. Peat moss decomposes slowly, but it can make the potting soil more compact and difficult for roots to penetrate.
Is It OK To Use Old Potting Soil?
If the plant you were growing was healthy, you might usually reuse the seed-starting mix. If you see pests or illnesses in your plants, sterilize the mixture to avoid infecting them the following year. First, clean out any roots, grubs, leaves, or other trash from the previous potting mix. Then choose the most effective approach for eradicating bacteria and insects.
Solarizing is one method for dirt sterilization. It entails placing old potting soil in securely sealed black plastic bags or lidded five-gallon buckets and keeping them in the sun for 4-6 weeks. Inside the buckets or bags, just enough heat builds up to kill bugs and germs.
Furthermore, you may add one part compost to three or four parts old potting mix. The new potting mix and the compost will help keep the mixture from compacting and provide the nutrients that plants require.
How Long Can You Keep A Bag Of Good Potting Soil?
Potting soil does not have an expiration date. However, its materials, moisture content, texture, and nutrient levels may fluctuate over time. Avoid mouldy potting soil. If you keep the seed-starting mix on a shelf, whether outside or inside, it is more likely to become wet in the rain or dry out, causing the dirt to alter. Instead, keep it dry in a shed or garage. An unsealed bag of potting mix will usually keep its best quality for 6 to 12 months. The opened bags can keep their moisture content for one to two years.
Read more: How Much Does A Yard Of Topsoil Weigh? The Answer Is Here
Can I Reuse My Good Potting Soil From Last Year?
Old potting soil should be replenished with slow-release fertilizers, vermiculite, or compost to restore lost nutrients. Because compost is thick, it can compress. You should only apply it sparingly. A ratio of one part compost to three to four parts potting mix is most effective.
How Do You Rejuvenate Old Potting Soil?
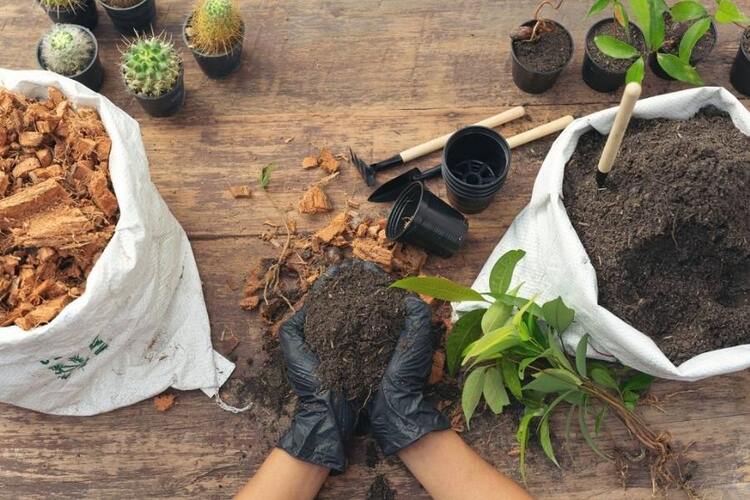
When winter comes to an end and spring arrives, it’s time to rejoice and get back to gardening! Don’t just fill your containers with last season’s seed-starting mix. Before you can utilize the dirt, you have to boost it. Use coconut coir instead of peat moss if your potting soil is thick and compacted. Coconut coir is a renewable resource that is more environmentally friendly than peat moss.
In a 1:1 ratio, combine the seed-starting mix and hydrated coconut coir. Please read the following instructions and follow them.
- Place the potting soil on a tarp
Clean the potting soil and remove rotten plant roots, weeds, and dead leaves. To loosen the potting soil for herbs, use a hand fork or a garden rake.
- Using water to clean
Add water to the dirt to flush out the excess salts:
Step 1: Fill a plastic bucket or bin with dirt and saturate it with water using a plastic bucket or container with drainage holes.
Step 2: Pour the dirt back onto the tarp once the water has stopped draining through the base, let it dry in the sun, and then loosen it up with your rake or hand fork.
Step 3: Then, after allowing the dirt to drain and dry, work it loose a second time, and repeat the watering procedure.
- Mix the ingredients in a 50/50 ratio.
The quickest approach to revitalizing the dirt is to add the same amount of freshly ground potting mix as you currently have.
When you use this strategy, you’re just covering up old dirt with new dirt. To mix the potting soil and garden soil, sift in your new dirt using a dirt sieve to remove clumps.
- Adjust pH as needed.
Test your potting soil’s pH to make sure it’s between 6.4 and 0.2 on each side of that sweet spot. If the pH is below 6.2, apply a dusting of perlite, gypsum, or lime to raise it.
- Mix it with a slow-release fertilizer.
The best ratio is adding a teaspoon of fertilizer to a gallon of dirt. Plants develop more uniformly because delayed-release fertilizers release nutrients at a slower rate.
- Storage
Storage is the final stage. Fill appropriate containers with the revitalized dirt and keep them somewhere dark and dry. The revitalized potting soil should sit for at least two weeks to allow the nutrients to be distributed evenly before being used.
After a few weeks, your fully recharged seed-starting mix will be ready to unleash a new lease of life, allowing you to enjoy another season of healthy plant growth for a fraction of the price.
Read more: How To Amend Clay Soil Without Tilling? 6 Steps & Guides
Does New Potting Soil Need Every Year?
The old potting mix needs to be modified to ensure proper drainage and nutrient levels, but it does not need to be changed every year. However, you must modify the dirt to ensure that it drains effectively and that there are sufficient nutrients in the potting soil.
Old potting mix is typically compact and shrinks away from the container’s sides. It makes it difficult for the dirt to drain correctly.
To revive the potting mix, follow a few simple procedures:
Step 1: Allow the dirt to dry off before proceeding.
Step 2: Remove any old, stringy roots and branches from the potting soil.
Step 3: Pasteurize the dirt the following spring. The simplest method is to solarize the dirt by placing it in a black garbage bag and laying it out on a hot day.
Step 4: Replenish the nutrients of potting soil. To ensure that the potting soil drains effectively, we propose a ratio of 1 part compost to 5 parts dirt.
Step 5: Fertilize the dirt once you’ve planted fresh plants in it. It will guarantee that the plant has enough nutrients all year. The ideal option is a slow-release fertilizer that lasts the entire growing season.
Can I Mix Old Compost With New?
You can combine used and fresh potting soil compost, using about half of each, and add a few handfuls of organic fertilizer to increase plant nourishment.
Alternatively, you may put the old potting compost in the bottoms of massive containers and cover the topsoil with the new mix. This easy method works excellently with potting soil that has healthy plants. But if you leave the potting soil in a humid environment, your plant is prone to blight and mildew. That time, you need to pot the compost used to produce edibles.
Should A Compost Bin Be Covered
Composting requires a mixture of brown and green materials, as well as air. A cover might restrict ventilation and irrigation during the composting process.
If the compost touches the elements, it will break down and lose nutrients as they drain into the potting soil. So, you should always cover the finished compost.
Here are a few reasons why you should cover a compost stack.
- Too much rain: If you live in a rainy area or have had a very wet year, covering your compost pile may help avoid sogginess.
- Promote compost development: A covering traps heat in a pile, allowing the beneficial bacteria to function more effectively and reducing the time it takes to generate finished compost by weeks. By utilizing compost, you can also enhance the composition of the clay soil without tilling.
- Get rid of the bugs: A covered pile will heat up, resulting in the temperatures required to destroy weed seeds or illnesses.
- Extend the season: You can keep a compost pile warm and active all winter by covering it.
Conclusion
As you can see from the above, the answer to the question, “Does potting soil go bad?” isn’t as simple as we’d like. Like every other product, potting mix loses its effectiveness and freshness with time. However, it does lose its freshness, strength, and efficacy with time. On the other hand, you may refurbish older plants or use a potting mix for general purposes unless you have incorrectly kept them and they have gotten entirely rotten.
Lastly, let me know what you think in the comments! And, as usual, good luck with your gardening!
FAQs


