Repotting Monstera With Moss Pole: 7 Step-By-Step Guide
Monstera deliciosa has an extensive root system. Thus, repotting it when necessary will help ensure optimal development. You must repot most plants at least once every few years. Repotting Monstera with moss poles can encourage Monstera to produce bursts of leaves and blooms.
If you repot your Monstera with moss poles, it will encourage Monstera to produce bursts of leaves and blooms. We’ll demonstrate how to repot a Monstera and insert a moss pole into it. Let’s dive right in!
Table of Contents
7 Steps To Repot Monstera With Moss Pole
To repot Monstera with a moss pole, you should find a new pole and put it near the edge of your pot. The optimal time to change a moss stick is when repotting Monstera or as a future addition. It lets you insert the rod deep into the potting soil without hurting any roots.
Follow our step-by-step instructions right below:
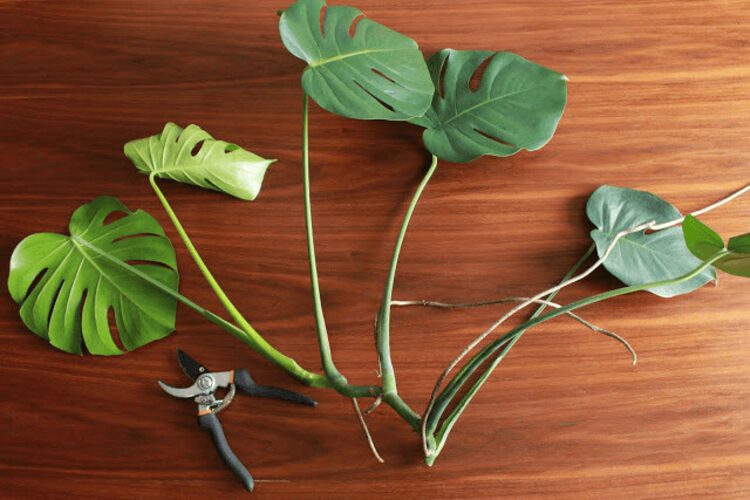
Step 1: Choose A New Pole And Pot
Begin by choosing a pot that is only slightly bigger in diameter but several inches deeper than your old one. Whether your plant already has one or you want to install one in the future, you’ll enjoy the pot being deep enough to support a stout moss rod.
You don’t want to go too big here since a much bigger pot than your roots might store more water than the plant can utilize, leading to root rot and overwatering. Next, choosing a moss rod and a container is the first step in repotting with one. Moss stakes come in various lengths, so choose one that’s the correct length for your plant.
The perfect length of the rod will be the pot’s height plus the distance from the pot’s edge to the top of the plant, plus a little more for it to grow. Several moss stakes are expandable, so you can put a new one on top to help your plant grow more robustly than the original one.
Step 2: Add New Soil
If you’re adding a new moss rod, now is the time to add a unique soil mix. We recommend filling the pot with potting compound to about 1/4–3/3 full. Premium, well-draining potting soil that includes perlite, ceramic granules, and compost is recommended for filling the pot during repotting. However, we recommend using premium, well-draining potting soil that includes perlite, ceramic granules, and compost.
Step 3: Remove The Monstera From Its Old Pot
To get your Monstera out of its pot, flip it over and gently ease the plant out. If it still won’t move, jiggle the pot slightly, but don’t pull on the plant. If the Monstera is enormous, you might wish to enlist the aid of a friend. When working with giant plants, one person should hold the container while the other supports the roots as they emerge.
To loosen the dirt around the pot’s edges, gently roll it over onto its side and lightly push around it. Continue until the Monstera has slipped out of the pot. Hold on to it if the Monstera has a well-attached moss rod. When removing the Monstera from its old pot, gently ease the plant out by flipping it over or jiggling the pot slightly.
Step 4: Put The Plant In The New Pot
Keep the plant straight in the new container, tightly fastening the rod to the pot and gradually lowering the roots. If the roots are too dense, carefully loosen them to create space for the rod. If required, use twist ties to secure your plant to the stake.
You should use more potting soil to fill up the roots’ spaces. It should be thick but not exceed 2 inches of clearance at the top.
Step 5: Adding A New Moss Pole
It’s time to repot the Monstera with a pole before inserting the plant into the new pot. Place the pole in the preferred position of the pot. Then, pour the soil mixture around the rod, two inches deep. Place the plant in the centre and fill up the soil with the soil mix to the top of the pot.
Although your pole may wobble slightly, do not compact the soil to keep it in position. Water your repotted Monstera to settle the soil down and keep the rod in place. It will become more stable over time when roots grow around the plant.
Step 6: Adding More Soil
When you’re satisfied with the appearance of your Monstera in the pot, carefully pour the leftover fresh soil mix into the new pot as needed. Gently firm down the soil after adding enough mix to the container to ensure that the plant is sitting erect in the pot.
Between the soil level and the top of the container, leave about 1-2 inches of room. When watering, this stops water from leaking over the pot.
Step 7: Water Well
Add filtered water until the drainage holes are full. Allow surplus water to leak out via drainage holes after watering abundantly. You can return to your regular feeding regimen after the soil has dried up.
Why Should You Repot A Monstera Deliciosa?
There are several reasons you should repot Monstera deliciosa and its advantages. The following are a few of them:
- Give the roots more room to expand: Allow lots of areas for the enormous root system to grow if you want it to grow upward and be extremely huge!
- Replenish minerals: Repotting your Monstera deliciosa with a new soil mix provides new vitamins and nutrients critical for its health.
- Do not compact the soil: Compacted soil is visible when the dirt pulls away from the pot’s border or when water rests on top of the soil rather than sinking in. A thick block of earth absorbs water poorly, resulting in a dried-out, unhappy plant.
When Should You Repot A Monstera Deliciosa?
The optimal time to repot is in the early spring. Your Monstera will go through a growth spurt during this time, so it should recover rapidly from repotting. However, if you notice that your Monstera’s roots protrude from the bottom of the plant pot, it’s time to repot them.
If you’re repotting your Monstera, now is the time to add a moss rod as a future addition. When repotting Monsteras, they should be repotted into a container that is only slightly bigger in diameter but several inches deeper than the previous one.
Does Monstera Need a Moss Pole?
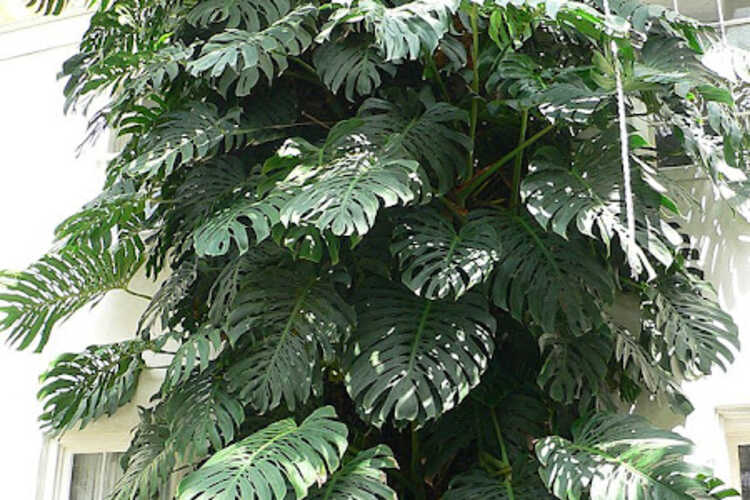
While Monsteras can grow without a moss rod, adding one more closely resembles their natural habitat. Monsteras are hemiepiphytes, which means they can grow on the ground or climb on tree trunks. Indoor plants will require the support of a moss pole for them to cling to. Monsteras can last for many years and grow up to several feet tall with adequate care.
The following are some of the advantages of moss rods:
- Assisting the plant and directing its growth
- Trigger aerial root development and branching.
- Increasing the number of nutrients and water available
- Promoting the growth of more giant and mature leaves
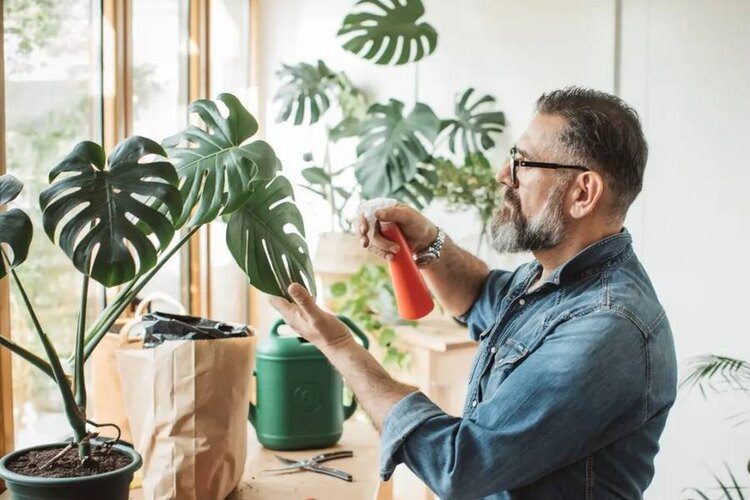
Do You Wet A Moss Pole?
Yes, you will need to water your moss rod if it is a tropical, humidity-loving plant. Watering the stick would provide your plants with an additional supply of water.
Once the aerial roots have fully hooked onto the rod, they will absorb this extra water, keeping their thirst and humidity levels in check.
There are several methods for keeping the moss rod wet:
- You may water it by watering the pole straight down.
- Spray it to make sure the water reaches its adventitious roots.
- Construct a pebble tray
- Store it in a damp area like the bathroom, laundry room, or near the kitchen.
- It is also easier to maintain and increase the humidity around the plant by keeping the soil moist.
How Long Does A Moss Pole Last?
A moss pole may last anywhere from four to six years. It is due to the long-lasting materials used in its construction.
External intervention, on the other hand, can easily break moss rods. Cats, for example, may easily climb a moss rod and dislodge the fibers or tear the thread or net that attaches it to the rod with their scratching movements.
If your moss pole is damaged, you can propagate a new one by wrapping a piece of sphagnum moss around a bamboo cane or other sturdy pole. Secure the moss in place with string or wire. You can then place the moss pole in the same pot as your Monstera plant.
How Do You Maintain A Moss Pole?
Place the moss pole in an excellent, damp spot or out of direct sunlight to keep it wet. It’s possible to use a humidifier to keep the moss rod moist.
Yet, keep in mind that too much humidity or wetness can create mold spores, harming your plants. To guarantee that your plants’ adventitious roots receive water, spray your moss rod often or pour water down the rod when watering. Most aroids will benefit from the increased humidity!
Conclusion
Monsteras can be tricky and may cause repotting shock or leaf loss, but it’s no more complicated than repotting any other plant with a plan and possibly an additional pair of hands. You can do it! Please share this helpful guide with anyone who loves gardening as much as you do. If you are lucky, you can make new friends.