How To Propagate Philodendron Birkin: 3 Methods With Steps
Propagation is an excellent way to expand your collection without incurring extra expenses. It’s a bit harder than breeding regular plants, but the right methods will make the process easier, more satisfying, and more fun.
This article acts as a detailed guide on how to propagate Philodendron Birkin using different techniques. Stick around until the end to listen to all our experiences!
How To Propagate Philodendron Birkin?
There are three methods to propagate Philodendron Birkin, including stem cutting, air layering, and dividing.
Stem Cutting
Stem cutting is one of the methods of propagation for Philodendron Birkin. Many beginner growers opt for the stem-cutting method since it is hassle-free, has a low failure rate, and roots relatively quickly.
You just need to choose a healthy, green stem and breed a brand-new plant from this stem. Here are the detailed instructions on stem cutting:
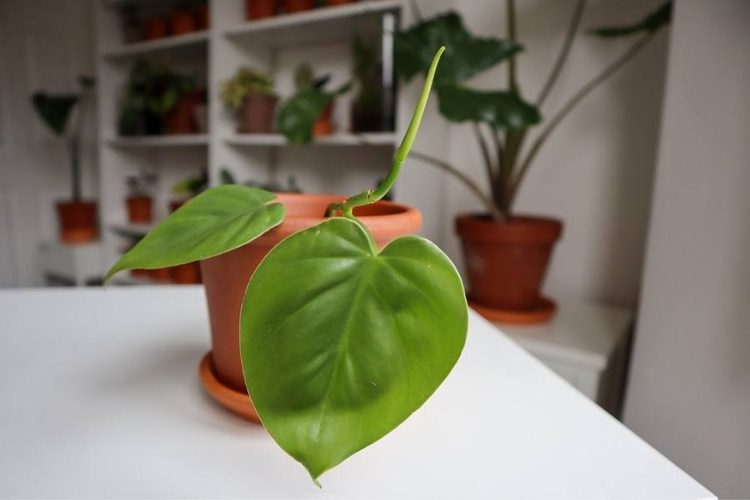
Step 1: Select a green, healthy stem
Start by picking a good stem with a beautiful color that is not drooping or wilting. Also, it should have at least 2–3 green leaves along the strip. The most vital thing to check for is that the stem you pick must have at least one node; the more nodes, the greater the result.
Another thing to note is that philodendrons often have aerial roots that emerge from the plant’s sides. They don’t look slightly firm and white like ordinary soil roots but are a bit woody.
Some varieties may have more aerial roots than regular ones, while others may have long aerial roots. It would be best that the stem you pick has 2-3 leaves and one node with some aerial roots. In my experience, the aerial root type is one of the fastest to produce new roots, mainly if you breed in water.
Step 2: Perform the cutting
After choosing the ideal stems, it’s time to perform the cuttings. Grab sharp pruning shears or scissors and disinfect the blades by wiping them with rubbing alcohol.
After that, start by cutting ½ to 1 inch underneath the node. Ensure to make your cut as clean as possible.
Step 3: Remove the bottom leaves
The next step is to remove the bottom leaves, which will end up landing in the soil or water. Both cases will do no good for the propagation procedure. Thus, remove the bottom leaves after cutting the stem. You need to keep the upper leaves because they will aid in photosynthesis. In addition, once you observe the curling leaves of the Philodendron, attempt to prune them promptly. Ensure to make the cut just above a node to prevent any impact on the surrounding leaves.
Air Layering
The second Philodendron Birkin propagation method we’d like to introduce is air layering. It involves breeding new plants from stems still sticking to the parent plant. Air layering can yield results, but it is a more complex and time-consuming method compared to stem cutting, with impressive results that long-term gardeners will treasure.
We’ll dig into the solid steps right below:
Step 1: Choose the perfect stems
It’s crucial to pick the healthiest, freshest stems on your plants for air layering. So, you can guarantee a faster rebound after propagation and maximum growth.
Step 2: Cut vertically
After choosing your ideal stems, perform a vertical cutting of 2-3 inches (5-8 cm) along the strip using a sterilized knife or tool. Ascertain that your blade goes deep to the halfway point of the stem.
Step 3: Ensure the cut remains open
The next step is maintaining an open incision so the roots can develop. Put a long toothpick into your cut’s center to make it open.
Step 4: Adhere the peat mosses to the stems
You first need to dampen the peat moss, then wrap the step with the wet moss where the cut is. Remember that the peat moss must always remain damp but not soggy since this may encourage bacterial growth.
Step 5: Wrap them up
Enclose the stem and peat moss with plastic wrap to prevent the moss from drying too fast and stop the bacteria and dirt from approaching the incision.
Step 6: Replant your Birkin
After caring for and waiting patiently for a couple of weeks, you will see new stems emerging from the peat mosses. This sign indicates that it is time to trim off your clipping. Cut underneath the roots and mosses and put your cuttings into a fresh potting substrate mix. Don’t forget to apply gentle pressure during this step to avoid hurting the roots and cutting and killing your Birkin.
Dividing
Dividing can be done with plants that have multiple offshoots, but it can also be done with single offshoots. That means you must go for air layering or stem-cutting techniques if your green is a single offshoot.
This propagation method will go like this:
Step 1: Navigate the multiple offshoots
Searching for a point to divide your Birkin will be effortless if there are multiple offshoots on the plant. They will grow entirely separate from each other in the center of every section.
Step 2: Remove the plant from the pot
After locating those different sections, you need to remove your philodendron from the pot to split the root systems. Lift the greens out and gently shake the potting mix around the root. The best way to soften the substrate is to use your fingers to carefully separate the roots.
Step 3: Split the sections
It may be necessary to cut off the weird roots if they don’t tangle easily, but you should succeed in pulling apart the sections without much effort. Sometimes, you may need to slice the soil around the greens to split them more easily. It’s OK to do so, but ensure each section has a robust root system that helps with successful propagation. When splitting those sections, it’s better to use shears than tear the green apart since this can destroy it badly.
Step 4: Reposition the parent plant
Place the parent plant back in its previous pot. After that, determine whether to place the offshoots straight in the potting blend or in the water first. It depends on your cutting’s size and the root system’s maturity. If the offshoots have pretty mature roots, they will develop fine in the potting mix. But if the roots feel like they need more time to grow, we suggest positioning them in the water before the potting mix.
Step 5: Maintain a periodic care routine
Once your cuttings settle in the fresh soil mix, you can continue the usual maintenance routine applied to other Birkins. If you transfer them to water first, it’s necessary to refresh the water once every few days and move them to the potting blend once they’ve matured.
Why Propagate Your Philodendron Birkin?
You should propagate Birkin since it offers many benefits besides bringing you more of your favorite plants. The primary reason is that you can multiply your plant ranges without spending dozens of dollars on new ones. Isn’t it fantastic to have free greens?
Plant cuttings are also a great gift for your friends, particularly if they love to have greens in-house but have no experience choosing or growing them. Another reason many long-term gardeners go for the propagating option is that their plants are becoming too leggy or too big.
Cutting the plant’s back will encourage bushier growth. Also, winter growth may make your greenery leggy or straggly, so cutting should be your choice.
How To Care For Your Philodendron Birkin Properly?
Now that you know how to propagate Birkin? We have some helpful tips for maintaining bred and parent Birkins after breeding that will help keep your collection healthy for an extended period.
Watering
This variety loves to remain a bit moist but not too wet. It’s critical since the line between root rot and good moisture is fragile. Philodendron Birkin should be watered when the top inch of soil is dry. So, a crucial step before watering is to feel the compound to determine its dry or wet level.
The substrate will signal the right moment to provide moisture, so don’t set a fixed watering schedule. Instead, observe it regularly to identify the signal.
Light
Philodendron Birkin prefers bright, indirect light, just like the Red Emerald Philodendron and other philodendron varieties. Greens that don’t receive enough sunlight to meet their demands will be unhappy and show sad-looking development. Yet, too much sunlight may ruin the leaves of your vegetables and cause severe sunburn.
That’s why it’s critical to ensure an indirect light source for the Birkins, meaning the sun’s rays shouldn’t shine directly on your greens.
Soil
This variety thrives best in airy, well-draining potting mixes that hold a decent amount of moisture. If it sounds confusing, here’s a detailed guide on what to do:
- Ideal soil: The ideal condition should have good drainage to prevent waterlogging.
- Airy: An airy substrate will lighten up your mix and prevent it from getting compacted.
- Well-draining: Most water must drain out to avoid leaving the roots too wet.
How do you tell if your potting soil has gone bad? There are four warning signs to check for.
Temperature
Philodendron Birkin prefers temperatures between 65 and 85 degrees F. If you live in cold regions with freezing winters, ensure to keep your plants away from cold areas in your house, like front hallways or draughty windows.
Fertilizing
Philodendron Birkin should be fertilized every 2-4 weeks during the growing season, usually in the summer and spring. Every fertilizer has a particular N-P-K ratio. A balanced product will have these three elements at the same level.
Conclusion
How to propagate Philodendron Birkin? You can choose from the three methods above: stem cutting, division, and air layering. These techniques are not too complex to apply for beginners and yield satisfying, rewarding results relatively quickly.
If you choose a suitable technique and follow the solid instructions above, trust that new, beautiful offspring plants are coming to you!
Related post: