
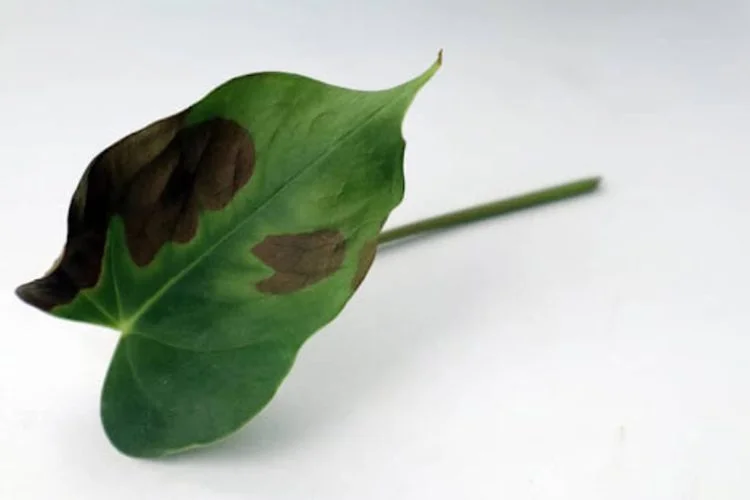
Quick answer: Brown spots on Monstera have several possible causes. Dry tan patches after a move to stronger light suggest scorch; soft spreading lesions suggest investigating root or leaf disease; crispy margins can point to water stress. Check the potting mix, drainage and underside of affected leaves before treating anything. Old brown tissue will not turn green again, but new leaves can stay healthy when the actual cause is corrected.
Match the symptom to the likely cause
| What you see | Possible explanation | Useful next step |
|---|---|---|
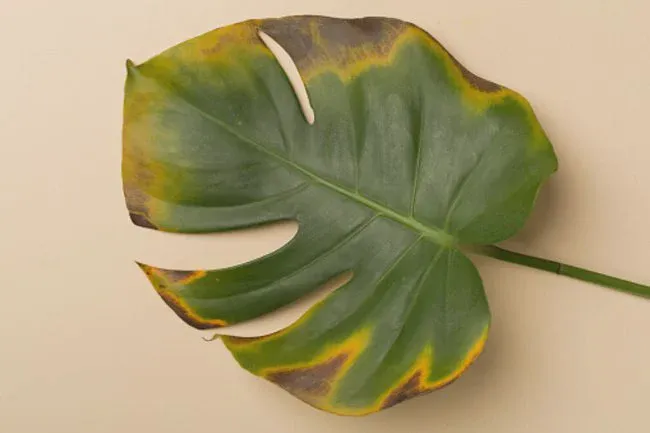
| Dry, bleached or tan areas facing a strong window | Sun scorch after abrupt exposure | Move into bright indirect light; acclimate more slowly |
| Dark patches with yellowing and constantly wet mix | Root stress, possible rot | Examine drainage, pot size and root firmness |
| Dry edges with very light pot and dry soil | Water shortage, dry environment or fertilizer salts | Check moisture and watering history before changing care |
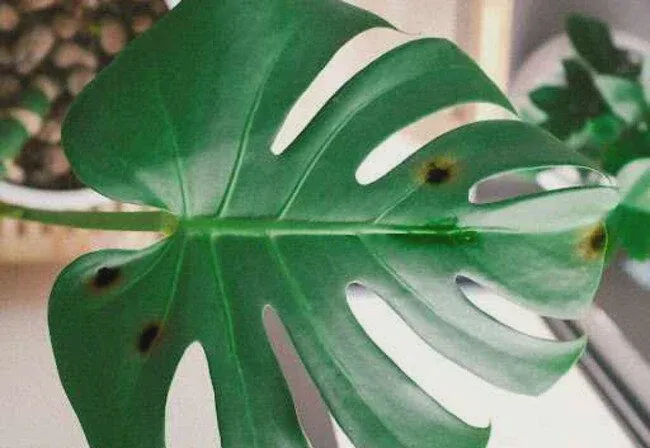
| Spreading spots across several new leaves | Possible leaf-spot disease or pests | Isolate, inspect both leaf surfaces and get diagnosis if progression continues |
Start with drainage and root health
Monstera needs a well-draining medium. Penn State Extension advises allowing the upper one to two inches of soil to dry between thorough waterings. A large plastic pot may remain damp deep below the surface even when its top is dry. Use the pot's weight and root-zone moisture as guides. If the plant smells foul or roots are soft and dark, correct prolonged saturation before considering fertilizer.
Separate sun damage from leaf disease
Scorch often appears as pale or brown dry patches on leaves exposed to stronger light, particularly after a sudden move. A fungal or bacterial problem may produce expanding lesions on multiple leaves, sometimes with halos or wet-looking edges. Appearance alone does not identify a specific pathogen. Keep new foliage dry when practical, improve airflow and seek a local extension diagnosis when spots spread.
Look for feeding damage and physical injury
Inspect leaf undersides and stem joints for mites, scale, thrips or other insects. Scratches from moving large leaves against supports or furniture can also turn brown. Do not spray a pesticide merely because a spot is present; match any control to a confirmed pest and follow the label for indoor ornamental plants.
What to do with a spotted leaf
A mostly green leaf can still photosynthesize. Leave it in place unless it is badly damaged, interfering with the plant or part of a diagnosed spreading disease. Use clean shears if removal is necessary; cutting out each spot rarely fixes the underlying condition. Assess new growth over several weeks.
Step-by-step care checklist
- Photograph both sides of affected leaves to track whether lesions spread.
- Check the upper and deeper potting mix for moisture and make sure water exits drainage holes.
- Look at recent changes in sunlight, fertilizer, temperature, watering and airflow.
- Inspect for active pests before selecting any insect treatment.
- Correct the supported cause, then monitor fresh leaves rather than expecting old brown areas to recover.
Frequently asked questions
Should I cut off all leaves with brown spots?
No. Keep leaves with plenty of green tissue unless they are severely damaged or a diagnosed disease-control plan requires removal.
Do brown spots always mean overwatering?
No. Scorch, underwatering, insects and localized physical damage also produce brown tissue. Examine soil and roots before repotting.
Will a humidifier remove the spots?
No. A clean humidifier can improve dry air, but it cannot reverse dead leaf tissue or treat an unidentified disease.